
What Plant Lovers Notice Instantly That The Rest Of The Yard Misses
Follow us on Google
Walk through a yard with someone who has spent years paying attention to plants, and you will notice something odd: they keep stopping.
Not to admire the flowers, but to crouch down, turn a leaf over, or press a finger into the soil.
Experienced gardeners have built a habit of reading a yard as a living system, catching early stress signals, ecological clues, and habitat gaps before those problems grow serious.
That kind of attention is not a gift you either have or do not have, it is a skill anyone can learn.
Experienced Gardeners Read Stress Before Damage
Most people walk past a struggling plant and see nothing wrong until leaves are brown and flowers are gone.
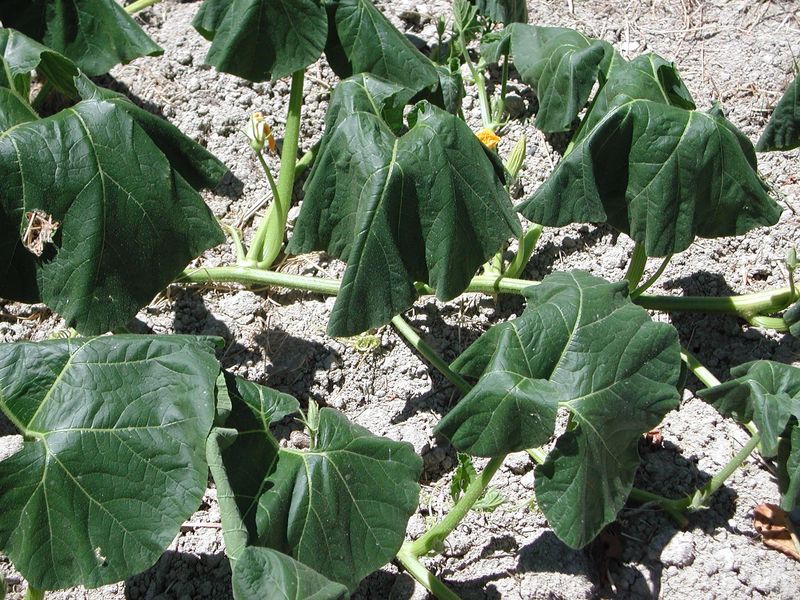
Gardeners who have spent seasons paying attention learn to scan for functional signals first, things like wilting at midday, inward leaf curl, scorched edges, stalled growth, or unusual insect activity on stems.
Those signals are the yard’s early warning system, and catching them before damage compounds is what separates a reactive approach from a practiced one.
The skill is not instant or infallible, and no single sign points to one guaranteed cause.
A wilted plant at noon might be reacting to heat, drought, root damage, disease, or just the normal midday behavior of certain species.
What experienced observers share is a habit of checking rather than assuming, which is why the University of Minnesota Extension plant diagnostic tool walks users through multiple possible causes for each symptom rather than offering a single answer.
Soil moisture, recent weather, plant variety, and the pattern of damage all feed into a useful diagnosis.
Noticing a symptom is only the first step, the investigation that follows is where the real work happens.
You do not need to recognize every plant on sight to do this well.
You need to slow down, look closely, and ask what changed recently in that corner of the yard.
The sections ahead cover specific signals worth learning: heat stress clues, what weeds suggest about site conditions, how to water by soil rather than appearance, what pollinators actually need across a full season, how to identify insects before treating them, and how to catch invasive spread while it is still manageable.
Each of these is a repeatable habit, not a superpower reserved for lifelong plant enthusiasts.
A Curling Leaf Starts An Investigation
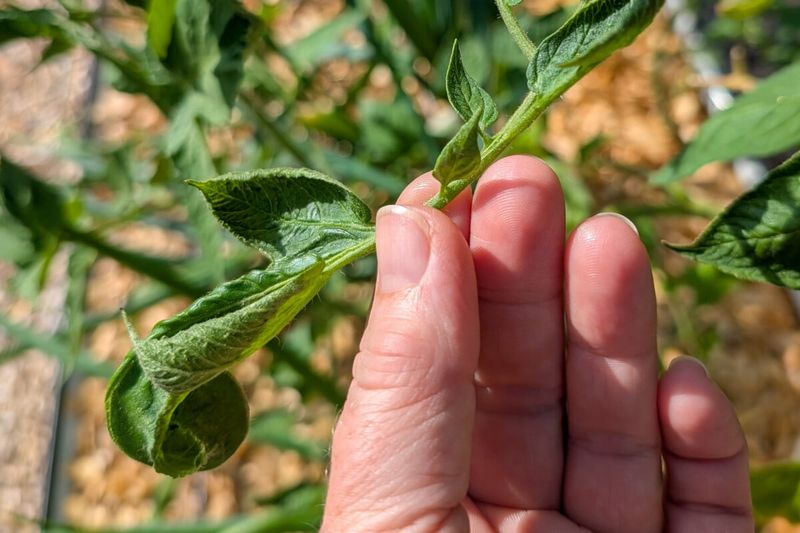
On a hot July afternoon, a tomato plant that looked fine at breakfast can look exhausted by lunch.
The leaves curl inward, the edges take on a papery tan color, and a few small flowers drop to the ground before they ever set fruit.
Those are real signals worth taking seriously, but they are the beginning of a question, not the answer.
University of Minnesota Extension guidance on heat stress identifies wilting, inward leaf curl, brown or bleached leaf edges, flower drop, and stalled growth as common signs that a plant is struggling with heat.
Some tomatoes, peppers, and annual flowers may drop blossoms around 90 degrees Fahrenheit, though that figure is approximate and applies to certain cultivars under certain conditions.
Night temperatures, humidity, water status, and how much direct sun a plant receives all shape how a plant responds to heat.
Before drawing conclusions, check a few things.
Press your finger about 2 inches into the soil to feel whether it is actually dry or just warm on top.
Think back over the past few days: did rainfall arrive, did you water, did the temperature spike suddenly?
Look at whether the curling affects the whole plant or just one side, whether the damage is on older leaves or new growth, and whether any insects are present on the stems or undersides of leaves.
Practical responses to heat stress include watering at the root zone rather than overhead, using soaker hoses to keep moisture where roots can reach it, and doing your garden work before 10 a.m. or after 4 p.m. to reduce stress on both plants and yourself.
A curling leaf is the plant asking a question.
Your job is to figure out which one.
Weeds Point Toward Conditions, Not Answers
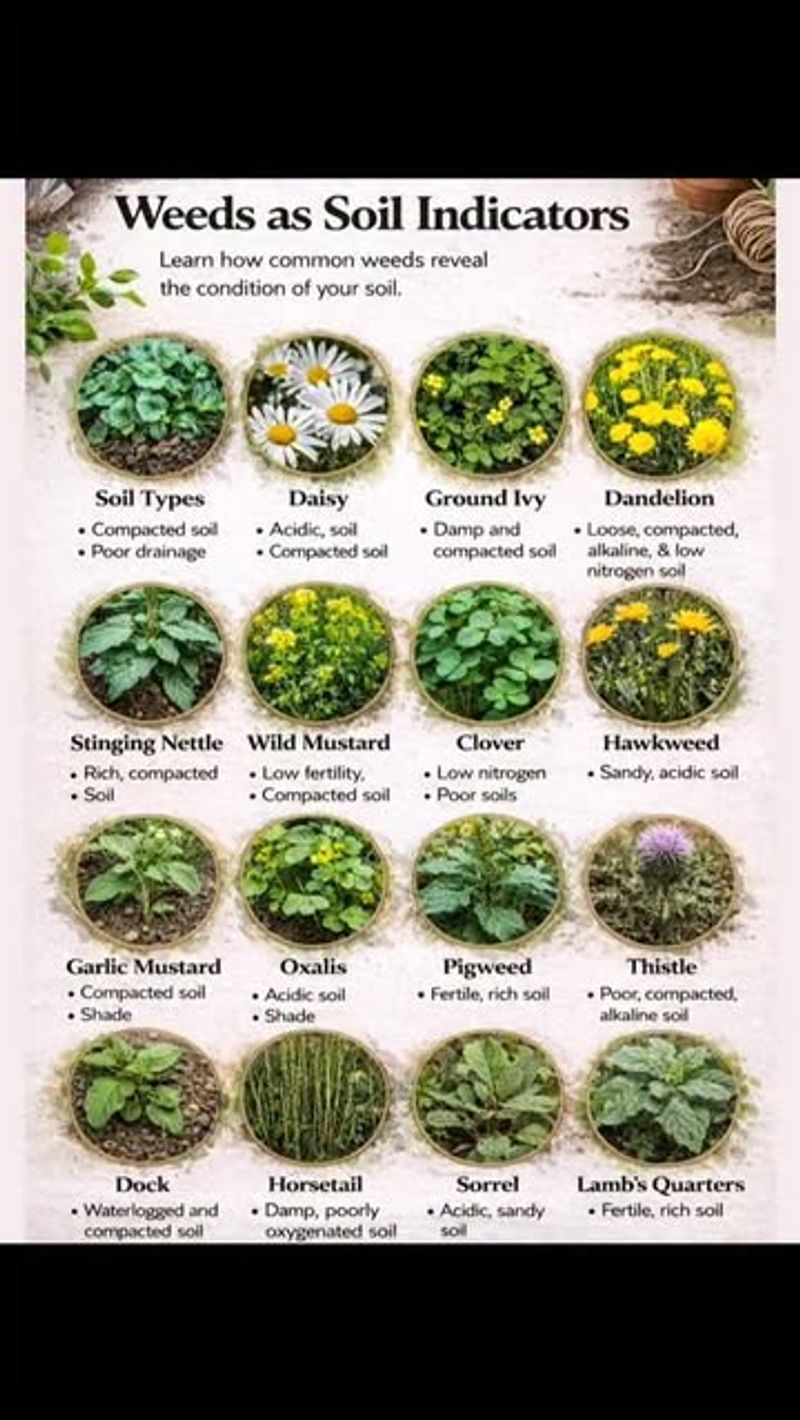
Certain weeds keep showing up in the same spots year after year, and that pattern is worth noticing.
A lawn corner that always fills with moss and chickweed probably stays wetter than the rest of the yard.
A path where dandelion, plantain, and prostrate spurge crowd in might be telling you the soil underneath is compacted from foot traffic or equipment.
Dry, thin areas where black medic and red sorrel take hold often reflect low moisture or poor organic matter.
These associations are real and useful, as Penn State Extension’s guide to indicator weeds explains, but they are clues rather than diagnoses.
Several different soil conditions can produce similar weed populations, and a weed’s presence alone cannot tell you whether your pH is off, your phosphorus is low, or your drainage needs attention.
Treating the soil based on weed observation without testing first can lead to adding amendments your yard does not need.
A soil test is the safer next step, and University of Minnesota Extension recommends testing every 3 to 5 years, or whenever you are converting a lawn area to a garden bed or investigating poor plant performance.
A standard test evaluates selected chemical and nutrient properties such as pH, organic matter, phosphorus, and potassium.
Physical conditions like texture, drainage, and compaction require separate assessment, often through observation or additional tests beyond a standard lab sample.
Collecting a good sample means gathering about 1 to 2 cups of mixed soil from several locations in the area you want to evaluate.
Weeds got you to the right question.
A soil test helps you find the right answer before you start spending money on amendments.
Watering Follows Soil And Weather
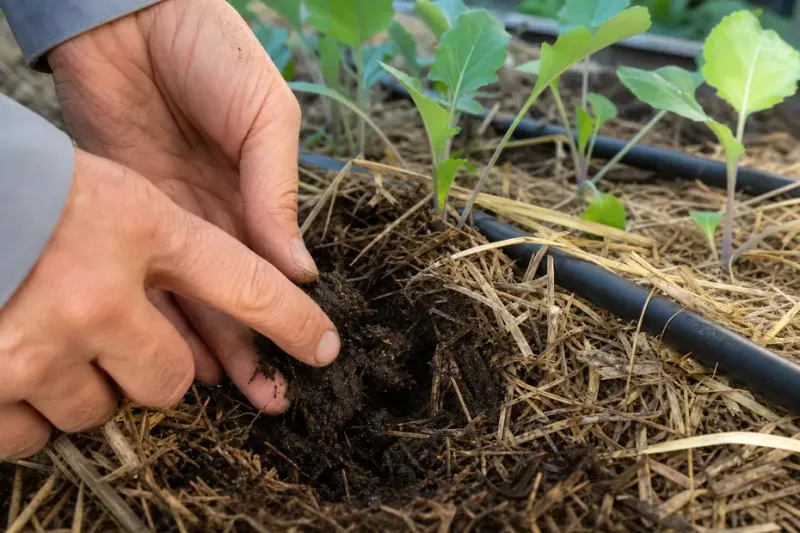
Watering by appearance is one of the most common habits in home gardening, and it often leads to plants getting water when they look droopy rather than when the soil actually needs it.
A plant can wilt from heat at 2 p.m. and recover completely by evening without ever being thirsty.
Checking the soil rather than the leaves gives you a more reliable answer.
A widely used starting point for vegetable gardens is about 1 inch of water per week, which works out to roughly 62 gallons for every 100 square feet of bed.
University of Minnesota Extension guidance on vegetable garden watering notes that sandy soil may need watering twice a week while heavier clay soil may only need it once, and that checking about 2 inches below the surface is more useful than watering based on how leaves look.
Mulch, rainfall, wind, temperature, plant maturity, and container size all shift how much and how often you need to water.
Established lawns work differently.
Water-saving strategies for home lawns suggest that infrequent irrigation that wets soil to about 6 inches can encourage deeper root growth and may use as little as 0.5 inch of water per session, depending on soil.
That guidance is not universal across every grass species, climate, or lawn condition.
Newly planted trees and shrubs need more attention than established plantings.
Watering guidance for newly planted trees and shrubs recommends daily watering for the first 1 to 2 weeks, every 2 to 3 days for the following 3 to 12 weeks, then weekly until the plant is established.
Matching your watering to actual soil conditions and plant stage can support healthier roots and may reduce unnecessary water use, though no single schedule guarantees a lower household bill.
Pollinator Habitat Extends Beyond Flowers
A yard full of flowers in June can still leave pollinators with almost nothing to work with by August.
Gardeners who pay attention to habitat notice what the yard offers across the whole season, not just what is blooming on the day they walk outside.
That longer view changes which plants you add, where you put them, and what you leave alone.
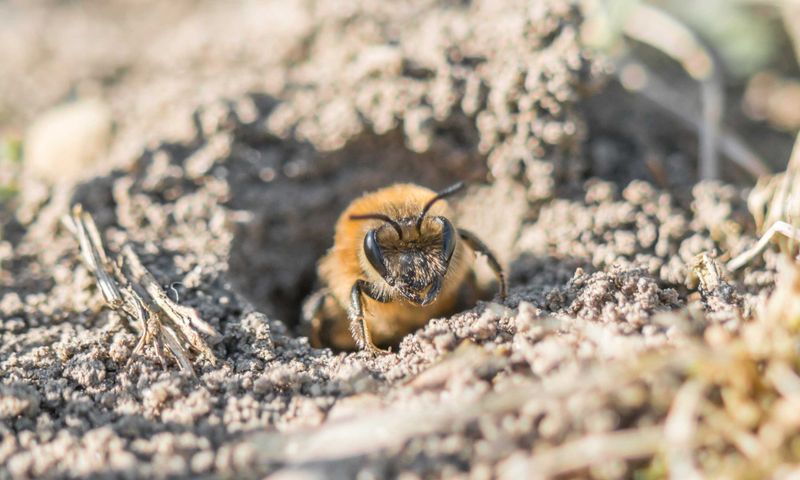
USDA’s Natural Resources Conservation Service pollinator garden design guide recommends selecting plants with bloom periods from spring through fall, grouping plants of the same species together to make foraging easier, and leaving some bare soil for ground-nesting native bees.
Many wild bee species nest in the ground rather than in hives, so a patch of undisturbed bare or lightly mulched soil can serve as habitat that a flower bed alone cannot provide.
Nectar plants and larval host plants are not the same thing.
A plant that attracts adult insects may not provide the leaves their caterpillars need to survive.
Pollinator-friendly does not automatically mean native, safe in every setting, or valuable for every life stage.
USDA habitat assessment guidance distinguishes high-value pollinator plants from low-value ornamentals and excludes invasive or noxious species from habitat evaluations.
A bee lawn can offer food for pollinators while remaining usable by people and pets, but it is not a substitute for a planting that includes native perennials, shrubs, and trees supporting more life stages.
Native status is also geographic: a plant native to the upper Midwest may not be native to coastal Georgia or the desert Southwest.
University of Minnesota Extension notes that native plants are often easier to establish in their home region, but they still need appropriate light, drainage, and soil conditions, and most require regular watering during their first season.
Minnesota alone hosts more than 500 bee species, most of them wild and unmanaged, which is a useful reminder that honey bees are not the only pollinators worth supporting.
Useful Insects Change The Treatment Plan
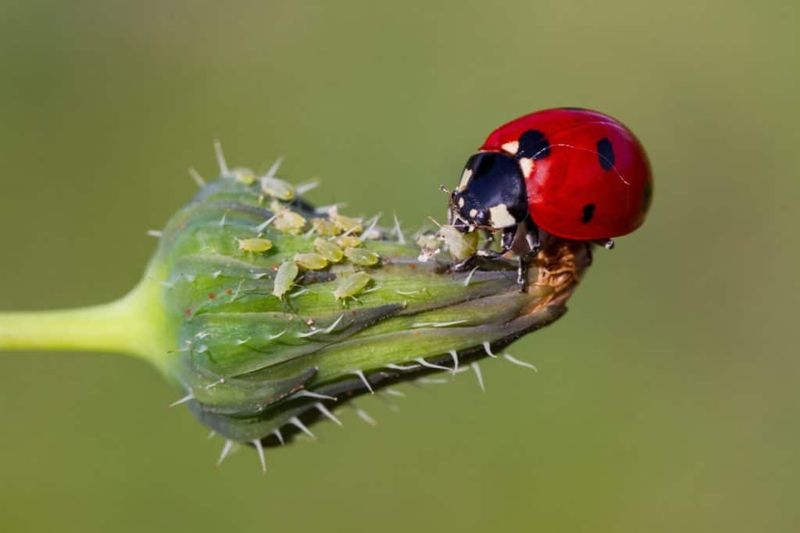
Reaching for a spray bottle the moment you spot something moving on a leaf is one of the most common mistakes in home pest management.
Many insects in a garden are harmless visitors, pollinators passing through, decomposers breaking down organic matter, or predators that are actively reducing the pest population you are worried about.
Treating without identifying can eliminate the allies doing your work for you.
EPA gardening guidance advises identifying the pest and confirming the actual problem before selecting any product, because some insects cause no real damage and others actively help control pests.
The University of Minnesota Extension garden diagnostic tool helps separate insect damage from disease, heat stress, herbicide exposure, and other nonliving causes that can look similar on a leaf.
A useful treatment hierarchy looks like this: inspect first, identify the organism and the damage pattern, then consider whether nonchemical options are practical.
Physical removal, row covers, and encouraging natural predators are often effective early steps.
Pesticides belong later in that sequence, and only when needed.
When a pesticide is warranted, the label is legally enforceable and must be followed exactly.
EPA pesticide safety guidance recommends keeping children, toys, and pets away from treated areas until the label permits reentry, and avoiding outdoor applications during windy or rainy conditions.
Pesticide label requirements apply to all registered products, including those marketed as natural or organic.
EPA pollinator protection guidance also recommends avoiding applications when bees are foraging and following any bloom-time, time-of-day, and buffer restrictions stated on the label.
A product’s natural origin does not remove the need to follow its directions, rates, and precautions.
Early Spread Is Easier To Stop
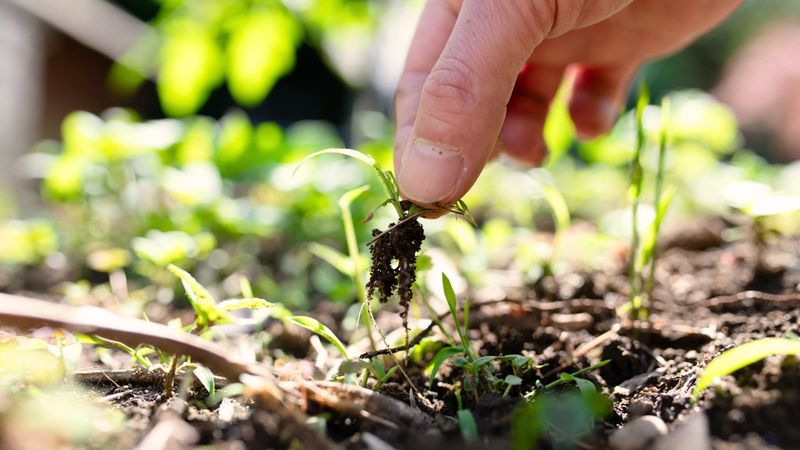
An unfamiliar plant shows up at the edge of a bed one spring.
By the following year it has moved three feet in two directions and set seed twice.
Many experienced gardeners can point to a moment like that and name the plant they wish they had pulled on the first day they noticed it.
Early action on spreading plants is almost always less work than late action.
Not every non-native plant is invasive, and that distinction matters.
Federal invasive species guidance defines an invasive species as one that is non-native to the ecosystem and likely to cause economic, environmental, or human-health harm.
Many introduced or naturalized plants cause no documented harm.
The ones that do tend to spread aggressively, outcompete plants that local wildlife depends on, and become much harder to remove once established.
Signals worth watching include plants that spread beyond their original bed without being replanted, seed heads forming faster than expected, and unfamiliar seedlings appearing in new locations each year.
USDA guidance on stopping invasive pests advises learning which species are problematic in your local area, removing invasive plants before seed dispersal, and destroying seed heads rather than composting them.
Moving plants, soil, seeds, or plant parts from one property to another can spread pests and diseases along with the plant.
Federal take-action guidance recommends checking local quarantine rules before sharing or accepting plant material, and reporting suspected invasive plants or pests to your county Extension office or state plant-health official.
The advantage experienced gardeners have is not perfect identification on first glance.
It is the habit of noticing something new, pausing to investigate, and acting before the problem outgrows the solution.