
Your Tomato Plants Stall Out In Late Summer For One Simple Reason, They’re Running On Empty
Follow us on Google
Around August, a lot of home gardeners notice the same thing: the tomato plants that were thriving just a few weeks ago look tired, pale, and barely productive.
It’s frustrating, especially when you’ve been watering faithfully and the season still has weeks left.
The good news is that a handful of clear clues can tell you whether the plants genuinely need feeding, or whether heat, disease, or plain old plant biology is the real culprit.
Getting that diagnosis right is the difference between a rescue and a wasted bag of fertilizer.
Nitrogen Is One Possible Late-Summer Limiter
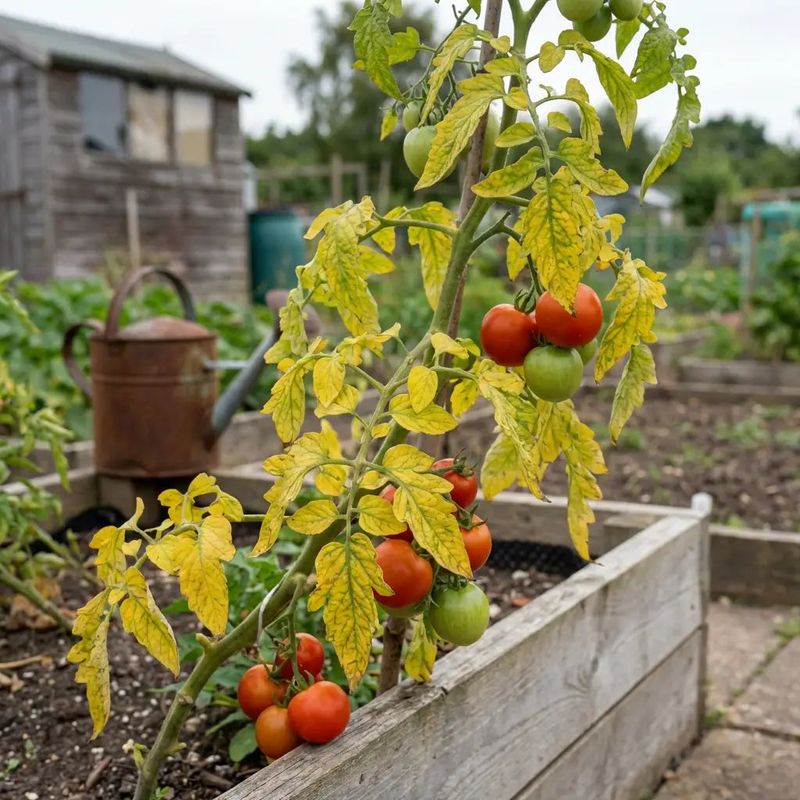
Tomato plants (Solanum lycopersicum) do not stall in late summer for one single reason, and the headline deserves a correction right up front.
Nitrogen shortage is a real and plausible cause, but heat, uneven watering, disease, root damage, and variety type can produce nearly identical symptoms.
Understanding nitrogen as one possible explanation, rather than the automatic answer, puts you in a much better position to actually help the plant.
That said, nitrogen deficiency is worth taking seriously.
Soil that is low in organic matter can run short of available nitrogen by midsummer, especially after weeks of watering, root uptake, and microbial activity have worked through the existing supply.
Colorado State University Extension guidance on growing tomatoes specifically notes that tomatoes may run out of nitrogen in mid to late summer and that a light supplemental feeding can be appropriate when symptoms and soil conditions support that conclusion.
The clues that point toward nitrogen as the likely culprit are gradual, relatively uniform paling or yellowing of the oldest, lowest leaves, combined with reduced overall plant vigor and smaller or fewer fruits than earlier in the season.
Those signs are meaningful, but they are not proof on their own.
Colorado State’s soil management and fertilization resource lists tomatoes among crops with a moderate nitrogen need, noting that plants in low-organic-matter soils are the most likely candidates for a midsummer supplement.
Before reaching for fertilizer, compare what you see against the other common explanations covered in the sections below.
A quick inspection takes five minutes and can save you from feeding a plant that needs something else entirely.
Inspect The Leaves Before You Feed
Slow down before you open the fertilizer bag.
The leaves on your tomato plant are telling a story, and reading that story correctly matters more than acting fast.
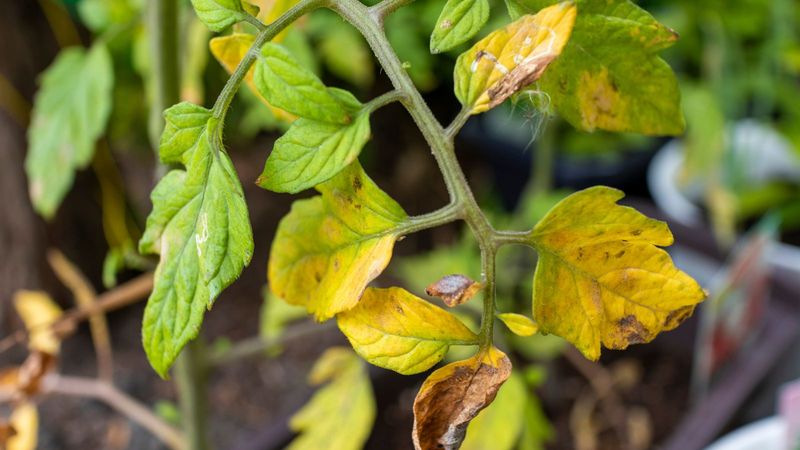
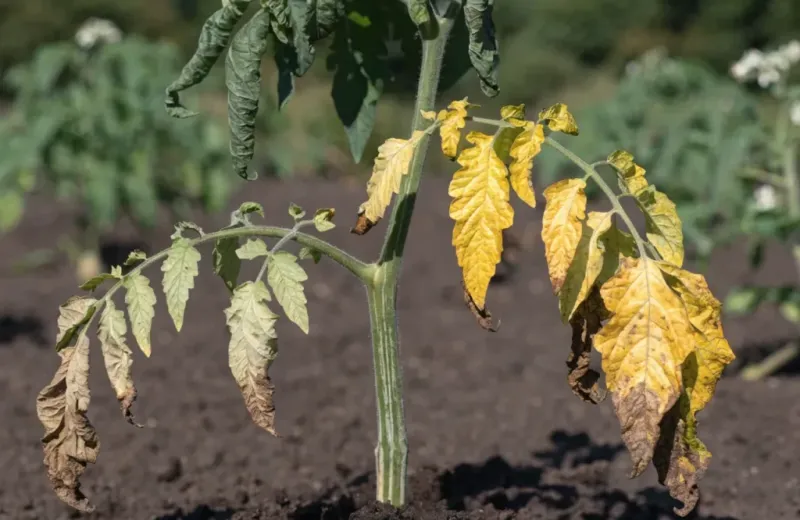
Nitrogen deficiency typically begins with pale green or yellowing color on the older, lower leaves.
The change tends to be gradual and fairly even across the leaf surface, without defined spots, rings, or lesions.
New growth at the top of the plant usually stays greener longer because the plant moves available nitrogen toward its most active tissue first.
University of Minnesota Extension’s fertilizing guide notes that excess nitrogen creates the opposite problem: overly lush, leafy growth that can delay flowering and reduce fruit set.
So more nitrogen is not automatically better, even when yellowing is present.
Disease symptoms look different, and that distinction matters.
Early blight appears as brown, roughly circular, target-like lesions on the lower leaves first, often with a yellow halo around each spot.
Septoria leaf spot produces clusters of small, round spots with tan or gray centers and dark borders, sometimes with tiny dark specks visible at the center.
Penn State Extension’s tomato disease guide describes both diseases as typically starting on older, lower foliage, which is exactly where nitrogen deficiency also begins.
That overlap is why a careful look at spot shape and pattern matters so much.
Along with the leaves, review your fertilizer history, your soil type, how new growth looks, and whether fruit production has slowed gradually or stopped suddenly.
When symptoms do not fit a clear pattern, a soil test is the most reliable next step and can rule out phosphorus, potassium, calcium, or pH as contributing factors.
Apply A Light, Label-Directed Feeding
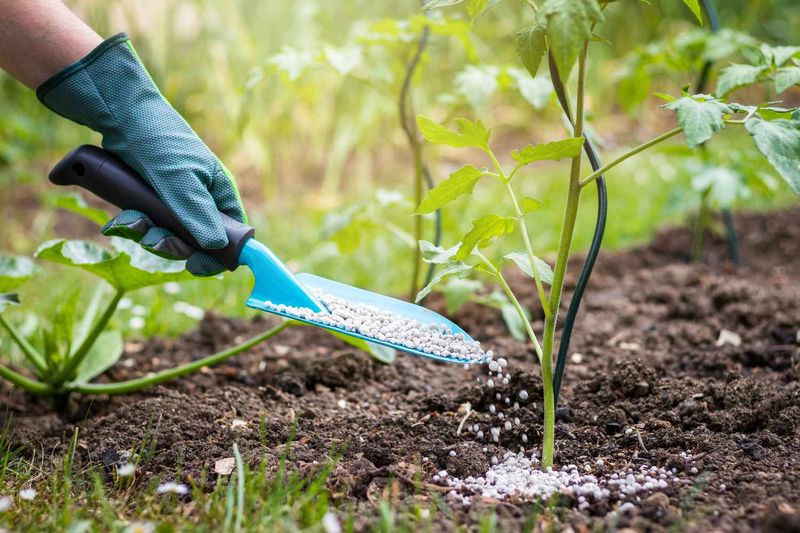
Once you have checked the leaves, reviewed your fertilizer history, and reasonably concluded that a nitrogen shortfall is the most likely explanation, a light feeding can help the plant recover some momentum.
The word “light” is doing real work in that sentence.
Follow the fertilizer label on whatever product you choose, and apply only as directed.
Keep dry granular fertilizer off the foliage and away from the main stem to avoid burning the plant.
Scatter it evenly around the root zone and water it in thoroughly so the nitrogen reaches the roots where it can actually be used.
Colorado State University Extension’s tomato growing guide suggests that a good window for a supplemental feeding is when the first fruits reach about 2 inches in diameter, which in many gardens falls in midsummer.
For a dry fertilizer example, the guide describes using 1 level tablespoon of 21-0-0 per plant, scattered in a 12- to 20-inch-wide circle and watered in.
That rate is specific to that product and that analysis.
Do not transfer it to a different fertilizer without reading the new product’s label carefully, because the nitrogen concentration changes the math entirely.
For soluble fertilizers, Colorado State describes applying according to the product label, with repeat applications roughly every 2 to 4 weeks when conditions support continued feeding.
That interval is not a universal schedule to follow automatically.
It applies only when symptoms and growing conditions suggest the plant still needs support and when the product label permits that frequency.
Illinois Extension’s tomato guidance uses a different product-specific schedule, recommending 1 tablespoon of ammonium nitrate per plant after the first fruits reach golf-ball size, with additional applications 3 and 6 weeks later, and warning not to let fertilizer contact foliage.
The fact that two respected Extension programs use different rates and intervals for different products is exactly the reason you must read your own label rather than borrowing someone else’s numbers.
University of Minnesota Extension reinforces this point, noting that applying nutrients beyond what the plant can use creates imbalances rather than better harvests.
Heat Can Mimic A Hungry Plant
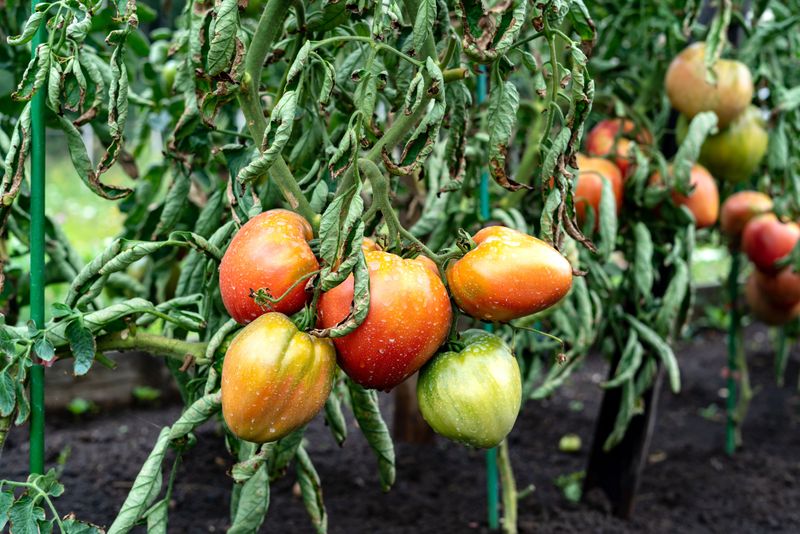
Picture this: it is a Tuesday in late July, temperatures have been near 95 degrees Fahrenheit for a week, and your tomato plants look completely defeated.
No new blossoms, maybe some wilting in the afternoon, and barely any fruit sizing up.
The temptation is to assume the soil is empty and add fertilizer.
But heat alone can produce every one of those symptoms in a plant that is actually well-fed.
University of Missouri Extension’s heat stress guidance identifies daytime temperatures around or above 90 degrees Fahrenheit and nighttime temperatures above roughly 70 to 75 degrees as conditions that can reduce pollen viability and cause blossom drop, stopping fruit set even when soil fertility is perfectly adequate.
The exact thresholds vary by cultivar, humidity, region, and growing conditions, so no single temperature works as a nationwide cutoff.
In lower-humidity climates, Arizona gardeners sometimes see fruit set slow around 90 degrees and pause near 94 degrees, while gardeners in the humid Southeast may experience different patterns with the same air temperature.
Heat-related wilt or blossom drop looks different from gradual nitrogen yellowing.
A heat-stressed plant often wilts in the afternoon and recovers by morning.
It may drop flowers without ever developing fruit.
The foliage color, especially on the older lower leaves, may stay relatively normal even when the plant looks exhausted.
University of Minnesota Extension notes that tomatoes can wilt or curl during hot, windy weather even when the soil is adequately moist.
The practical response during a heat stretch is to keep roots evenly watered, maintain a 2- to 3-inch layer of mulch over the root zone, and avoid removing more foliage than necessary.
Missouri Extension suggests using partial shade fabric when sparse foliage leaves fruit directly exposed to intense sun.
Adding nitrogen during a heat event will not restore fruit set and may push leafy growth at the expense of the fruit the plant is still trying to develop.
Keep Water And Nutrients Moving
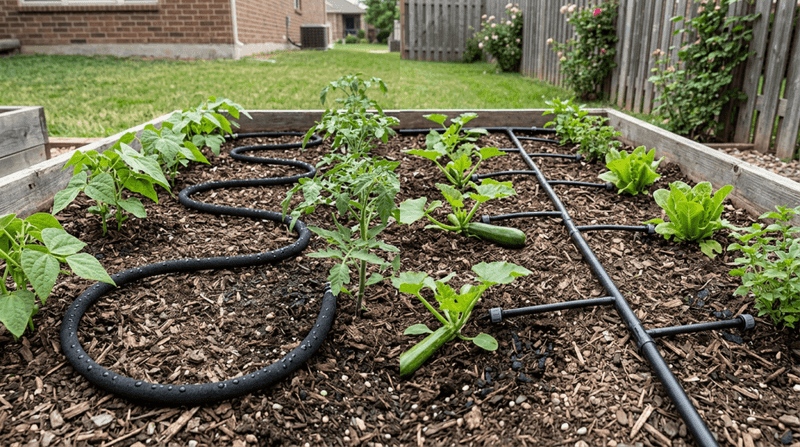
Fertilizer is only as useful as the water carrying it to the roots.
A plant sitting in dry, cracked soil cannot absorb nitrogen even when plenty is present, and a plant in waterlogged soil is losing root function fast.
Consistent, even moisture at the root zone is not a bonus feature of good tomato care, it is the foundation everything else depends on.
University of Minnesota Extension’s irrigation guide for vegetables recommends deep, even watering that reaches the full root zone rather than light, frequent surface wetting.
A soaker hose or drip system delivers water slowly at ground level, giving roots time to absorb it without runoff or pooling.
Aim for roughly 1 to 1.5 inches of water per week from rain and irrigation combined, adjusting for your local heat and soil drainage.
Mulch, applied 2 to 3 inches deep over the root zone, helps hold that moisture in and keeps soil temperatures from spiking during afternoon heat.
Consistent moisture also supports calcium movement into developing fruit.
That connection matters because calcium delivery problems can show up as blossom-end rot, a disorder covered in more detail in the next section.
Steady watering does not cure every disorder, but erratic swings between dry and saturated soil create a chain of problems that fertilizer cannot fix.
Overhead watering is worth reconsidering, especially in humid climates.
Penn State Extension’s late blight guidance explains that splashing water and prolonged leaf wetness create conditions that favor foliar disease, so directing water at the root zone rather than the canopy is a simple protective habit.
Container growers face an extra challenge: frequent drainage through the bottom of pots can remove both water and dissolved nutrients faster than garden beds lose them.
University of Minnesota Extension’s container plant guidance notes that containers may need watering daily or more often during hot, dry weather, and that a lower-rate, label-directed soluble fertilizer applied more frequently may be appropriate.
Always follow the product label rather than guessing at a rate.
Disease And Root Damage Need A Different Fix
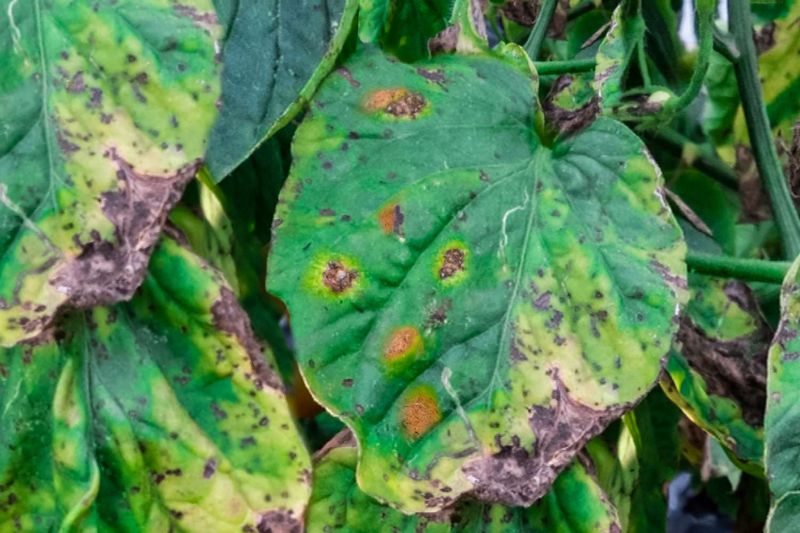
Fertilizer is a poor substitute for a diagnosis.
When yellowing, wilting, or defoliation has a disease or root cause behind it, adding nitrogen does not help and can sometimes make things worse by pushing soft new growth that is more vulnerable to further damage.
Several diseases begin exactly where nitrogen deficiency does: on the older, lower leaves.
Early blight produces brown, circular lesions with a target-ring pattern, usually surrounded by yellow tissue.
Septoria leaf spot creates clusters of small spots with tan or gray centers, dark borders, and sometimes visible dark specks inside each spot.
Penn State Extension’s tomato disease and disorder guide describes both diseases as typically progressing upward from the base of the plant as the season advances.
Late blight is more aggressive and can collapse a plant rapidly under cool, wet conditions, producing water-soaked lesions on leaves and stems with white powdery growth visible on the underside of affected tissue.
Penn State’s late blight resource makes clear that spreading spots, rapid defoliation, stem lesions, or white growth beneath leaf spots require disease management, not fertilizer.
If the pattern fits a disease, contact your local Cooperative Extension office or plant clinic for confirmation and management options.
Blossom-end rot, that leathery dark patch on the bottom of developing fruit, deserves its own clarification.
The affected tissue has a localized calcium deficiency, but that does not automatically mean the soil is short on calcium.
Penn State Extension’s blossom-end rot guide explains that irregular watering, root injury, heat, salinity, and rapid growth can all interfere with calcium delivery even when soil calcium is adequate.
University of Minnesota Extension’s tomato disorders resource adds that adding nitrogen to a plant showing blossom-end rot can worsen the situation if it drives rapid leafy growth or compounds moisture stress.
The first response should be steady, even watering, a layer of mulch, and root protection, followed by a soil test if the problem persists rather than an automatic reach for a calcium spray or any household amendment.
Check Whether The Variety Is Finishing Normally
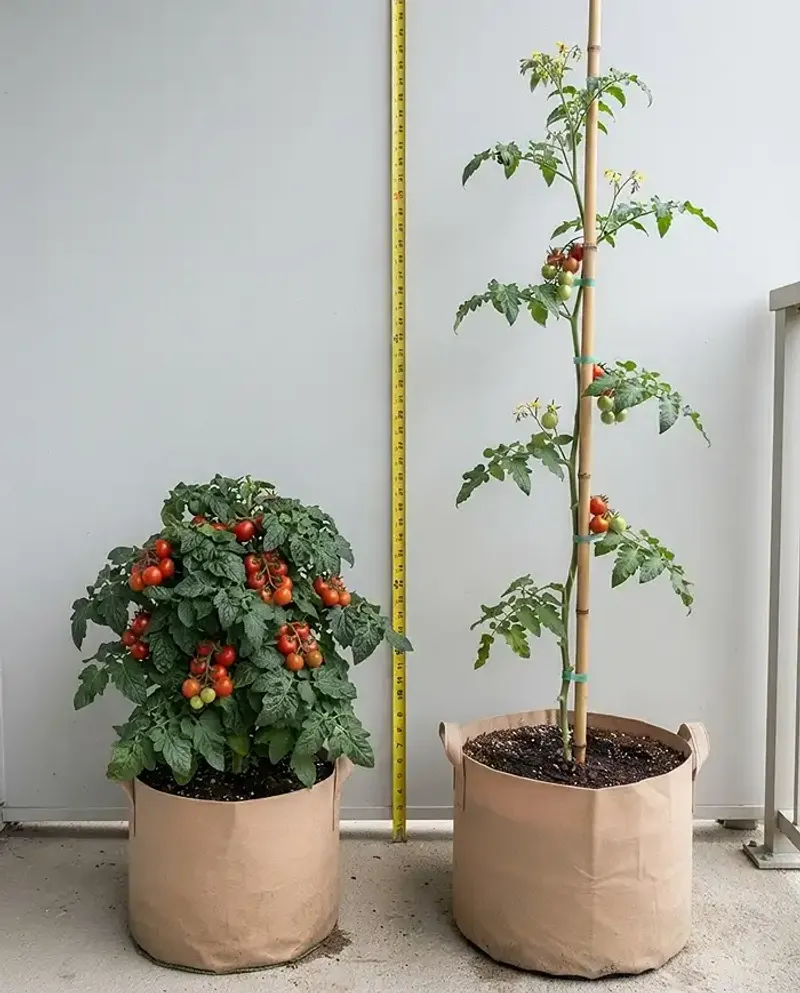
Before concluding that something has gone wrong, check the seed packet or plant tag still stuck in the pot.
The answer to “why did my plant stop growing” is sometimes printed right there.
Tomatoes come in two broad growth habits.
Determinate varieties, sometimes called “bush” types, stop extending their main shoots once terminal flower clusters form at the growing tips.
The plant sets a flush of fruit, ripens it over a relatively concentrated window, and then naturally slows down or stops producing new growth.
That is not a sign of depleted soil or heat damage.
It is the variety doing exactly what it was bred to do.
Illinois Extension’s tomato guide explains this distinction clearly, noting that determinate plants have a defined growth cycle while indeterminate types continue extending and flowering until frost or severe stress ends the season.
Indeterminate tomatoes, by contrast, keep growing and setting new flower clusters throughout the season.
A genuine slowdown in an indeterminate variety in good soil, with adequate water and moderate temperatures, is more worth investigating.
University of Minnesota Extension’s tomato growing guide notes that indeterminate varieties can produce fruit right up to the first frost when conditions support it.
The practical takeaway is simple: a determinate plant that has ripened its main crop and gone quiet is not a candidate for late-season fertilizer.
Feeding it will not restart a growth cycle that has already completed, and it may push soft new foliage that cannot support meaningful fruit before frost arrives.
Save the fertilizer for indeterminate plants that show genuine signs of a correctable nutrient shortage, confirmed by the leaf inspection described earlier in this article.
Use A Diagnosis-First Late-Summer Plan
The patch is not hopeless.
A clear sequence of checks, done in the right order, tells you what the plant actually needs rather than what feels like the obvious fix.
Start by inspecting the oldest, lowest leaves for the gradual, even paling that suggests nitrogen shortage.
Then look for spots, lesions, or rapid defoliation that point toward disease.
Penn State Extension’s disease and disorder guide is a useful reference for sorting those patterns.
Next, review recent temperatures and watering.
If daytime highs have been pushing 90 degrees Fahrenheit or above and nights have stayed above 70 to 75 degrees, University of Missouri Extension’s heat guidance suggests heat is a plausible explanation for reduced fruit set, independent of soil fertility.
Then identify the variety: determinate plants may simply be finishing their natural cycle.
When gradual lower-leaf yellowing, limited fertilizer history, and low-organic-matter soil all point toward nitrogen, apply a light, label-directed feeding, water it in thoroughly, and give the plant 7 to 10 days to respond before deciding whether to repeat.
University of Minnesota Extension is clear that applying more nutrients than the plant can use creates new problems rather than solving existing ones.
When the pattern is unclear, a soil test is the most reliable guide.
Whatever the diagnosis, protect the foliage you have.
Removing too many leaves at once reduces photosynthesis and exposes fruit to sunscald.
Even watering and mulch support recovery across nearly every late-summer scenario.
A plant that was genuinely low on nitrogen may regain some vigor after a careful feeding.
A plant limited by heat or disease needs protection and time, not more fertilizer.
The goal for the rest of the season is not a perfect plant, it is protecting the fruit already on the vine.