
If you’ve ever wished to multiply your favorite rose bush without spending a fortune, you’re in luck—propagating roses from cuttings is easier than you might think. This classic method lets you grow identical, healthy rose plants using just a stem, a bit of patience, and the right technique.
Perfect for beginners and seasoned gardeners alike, this process requires minimal tools and offers rewarding results, from fragrant blooms to lush new shrubs that carry the charm of the original. Whether you want to expand your garden, gift a personal plant, or preserve a beloved variety, it all starts with one small cutting.
Follow these 12 simple steps to grow your own gorgeous roses at home, and watch your garden bloom with beauty and sentimental value.
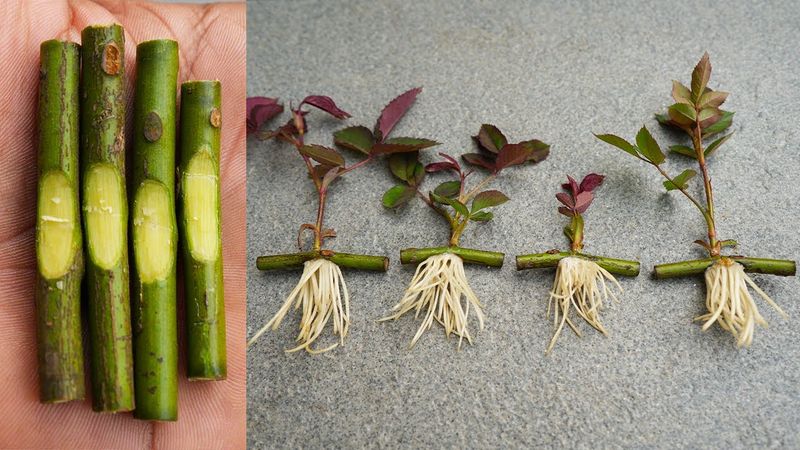
Choose the Right Cutting
Begin with a healthy, vibrant rose bush. Search for a stem that is about the diameter of a pencil, lush green, and free from flowers. This ensures the cutting has enough energy to root successfully. When selecting, remember that the healthier the parent plant, the better the offspring will be. Choose a stem that isn’t too old or too young, ideally from this year’s growth, as it strikes the right balance between flexibility and strength.
Prepare Your Tools
Before you start, ensure your tools are in top condition. Sharp, clean pruners make a significant difference, reducing damage to the plant. Sterilize your tools with rubbing alcohol to prevent the spread of diseases. This simple step protects both the cutting and the mother plant. A little preparation saves future headaches and promotes healthy growth. Gather everything you need within reach to streamline the process.
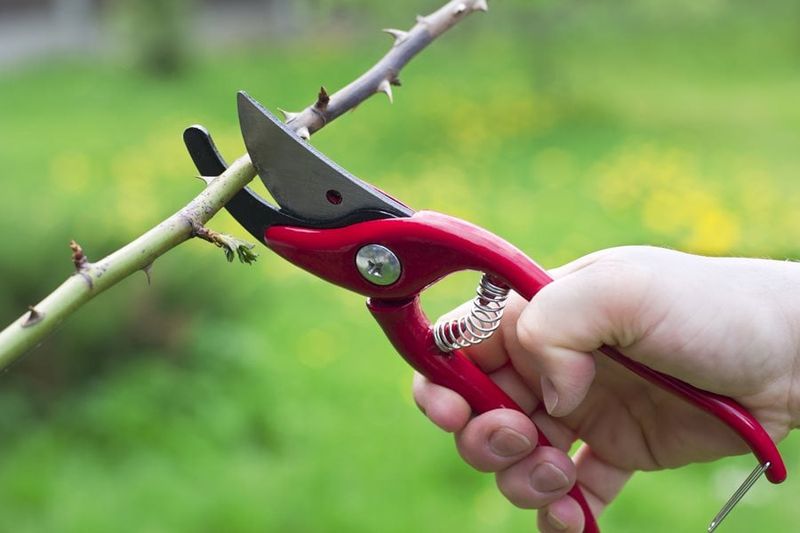
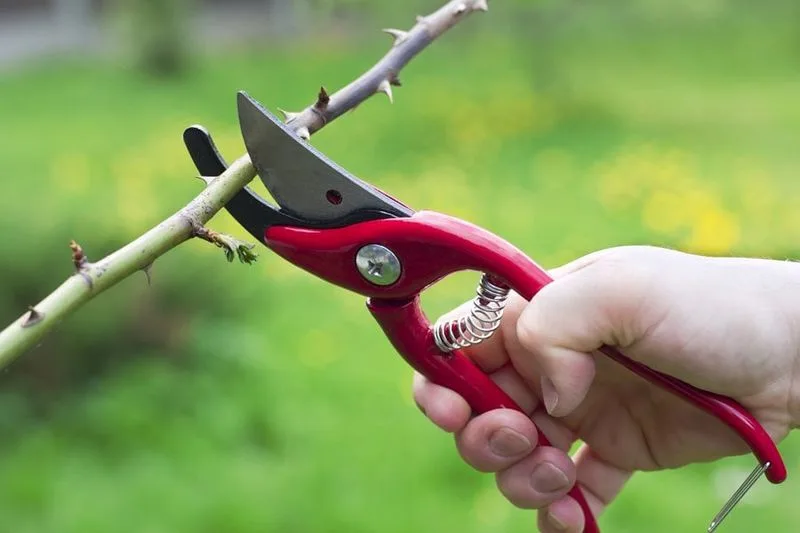
Take the Cutting

With precision, cut a 6-8 inch section from your chosen stem. Aim for a clean cut just below a node, where leaves attach to the stem, as this is where roots will likely form. Handle the cutting gently to prevent bruising or crushing the stem. Remove any flowers or buds to concentrate the plant’s energy on root development. This part is crucial, as a clean cut encourages successful rooting.
Remove Lower Leaves

Gently strip away the lower leaves from your cutting, leaving just a few at the top. This reduces water loss and minimizes the risk of rot while the cutting is rooting. Leaving some leaves helps the cutting photosynthesize, providing it with vital energy. Balance is key: too many leaves can desiccate the stem, while too few may hinder growth. Handle the leaves carefully to avoid damaging the stem.
Dip in Rooting Hormone
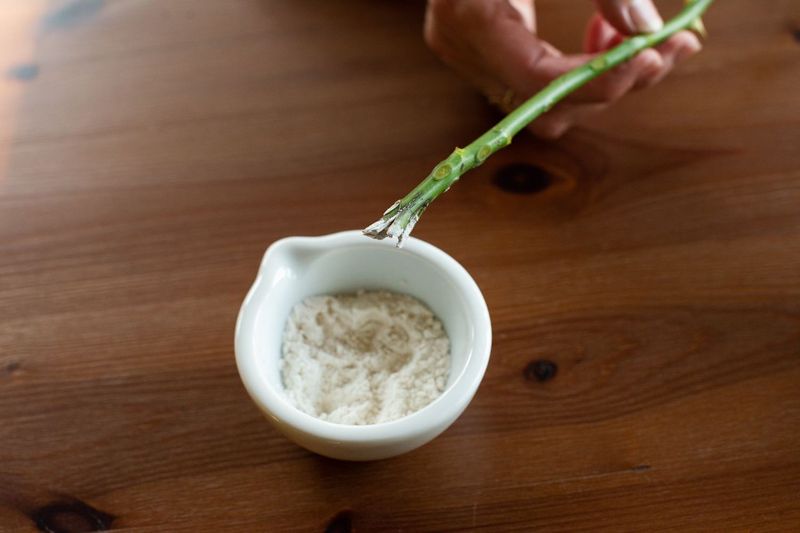

Rooting hormone is your ally in accelerating root development. Dip the cut end of your stem into the hormone, covering the base generously. This stimulates growth hormones in the plant, encouraging faster root formation. While not mandatory, this step can greatly improve success rates. It’s akin to giving your cutting a head start in its new life. Ensure the hormone covers all the way up to the first leaf node.
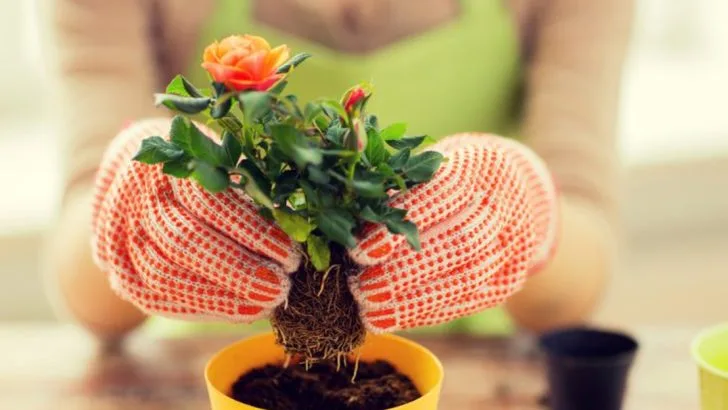
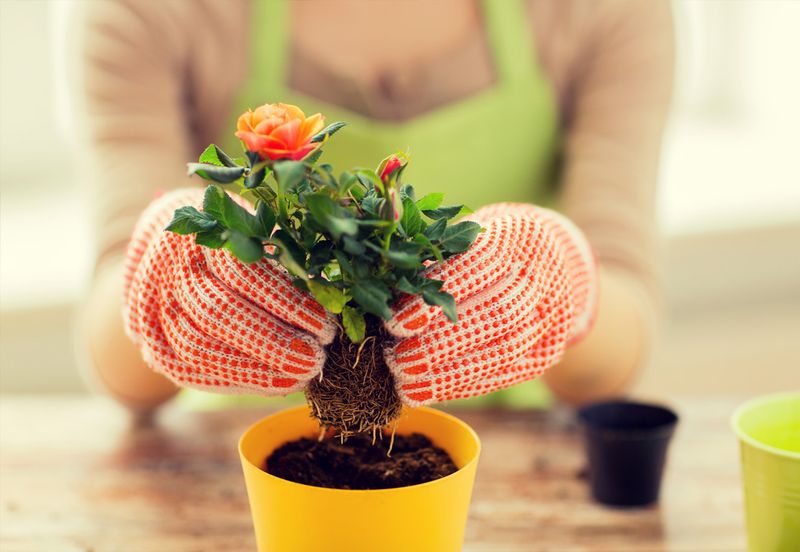
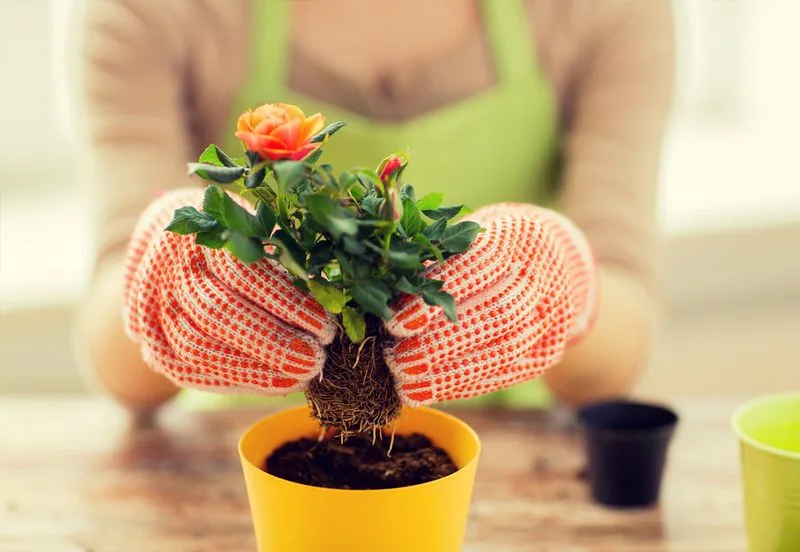
Plant the Cutting in Soil
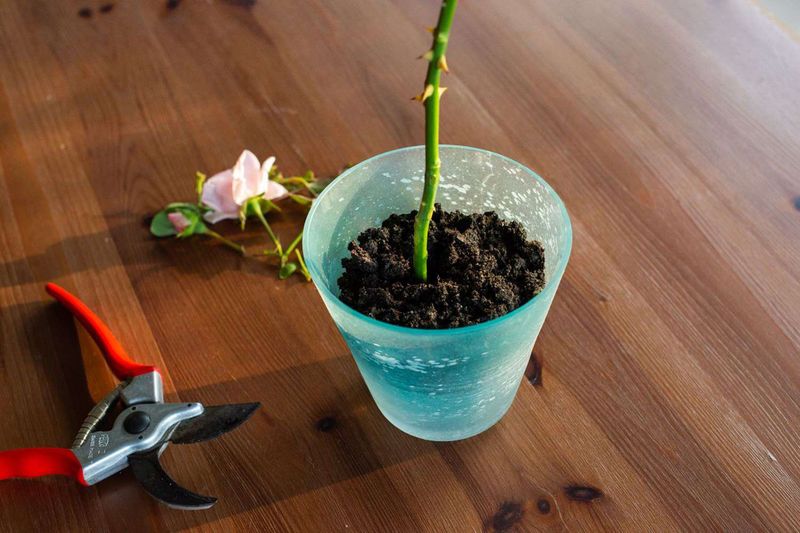

Use a well-draining potting mix, rich in nutrients, to give your cutting the best start. Insert the stem about halfway into the soil, ensuring the node is covered. Firm the soil gently around the stem to eliminate air pockets, but avoid compacting it too tightly. Proper planting depth and soil contact are crucial for successful rooting. Place the pot in indirect sunlight to protect the cutting from harsh rays.
Water Thoroughly


After planting, give your cutting a good watering to settle the soil and hydrate the stem. Ensure the water drains well to prevent soggy roots that can lead to rot. Keep the soil consistently moist but not waterlogged during the rooting phase. This balance helps encourage root development while protecting the stem from fungal infections. Use tepid water to avoid shocking the cutting.
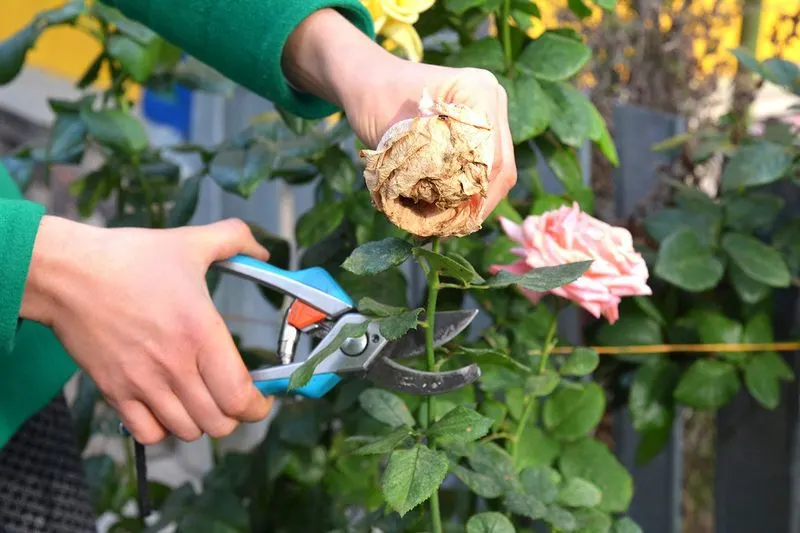
Create a Humid Environment
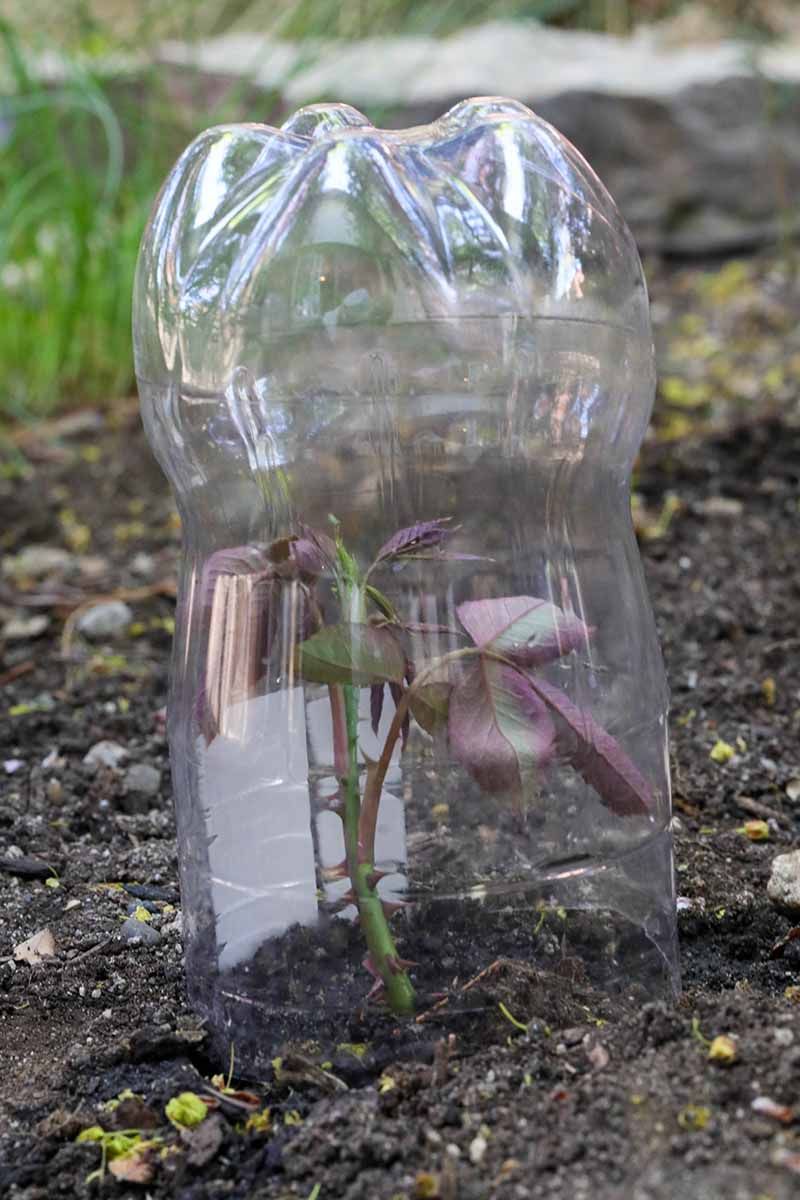
Humidity is crucial for preventing dehydration in cuttings. Cover the pot with a clear plastic bag, propped up with sticks to avoid touching the plant. This creates a mini greenhouse, trapping moisture and warmth. Monitor for condensation; if too much gathers, vent the bag slightly to prevent mold. This controlled environment mimics the cutting’s natural habitat, aiding in root formation.
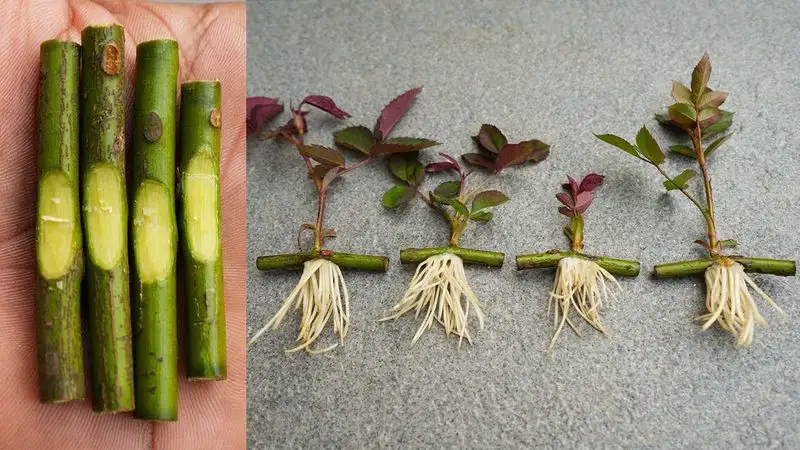
Monitor Growth


Check your cutting regularly for signs of growth, like new leaf shoots or root development. Gently tug the stem after a few weeks; resistance indicates root establishment. Patience is key, as roses take time to root. Adjust care as needed, ensuring the cutting remains healthy. Each new shoot is a victory, signaling a successful transition to a new plant.
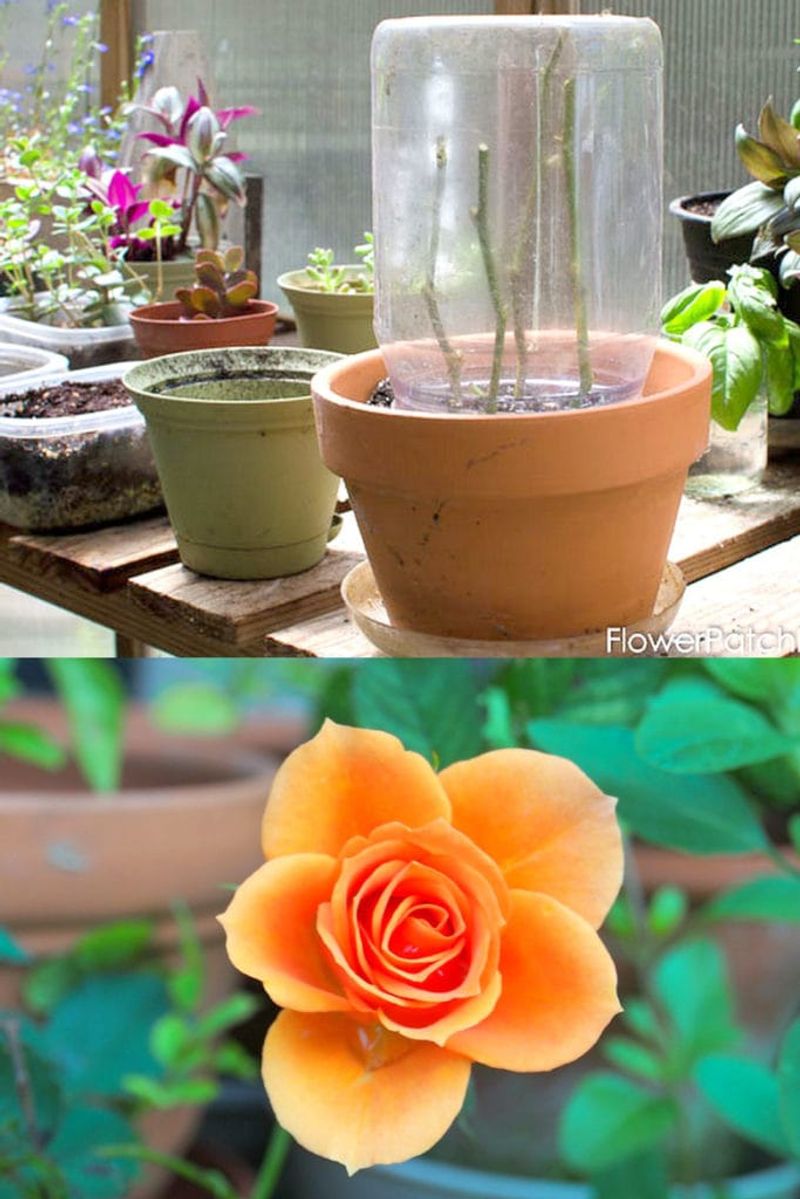
Transplant to Larger Pot


Once roots are established, it’s time to move your new rose to a larger pot. Choose a pot that’s one size up to give the roots space without overwhelming them. Fresh soil is essential to provide the nutrients required for continued growth. Handle the plant gently to avoid disturbing delicate roots. This transition marks a new phase in the plant’s development, setting the stage for a thriving rose bush.
Gradually Introduce to Sunlight

Introduce your rose cutting to direct sunlight slowly, starting with morning sun. Gradual exposure prevents leaf scorch and helps the plant acclimate to its new environment. Monitor the plant’s response, and pull back if signs of stress appear. This step is crucial in strengthening the leaves and encouraging robust growth. As the cutting adapts, it becomes more resilient.
Ongoing Care and Maintenance
Consistent care ensures your rose thrives. Regular watering, feeding, and pruning keep the plant healthy and blooming. Watch for pests, and treat any issues promptly. Roses are rewarding but require attention to detail. Each season brings new challenges and opportunities for growth. Enjoy the process, and your garden will reward you with stunning blooms year after year.