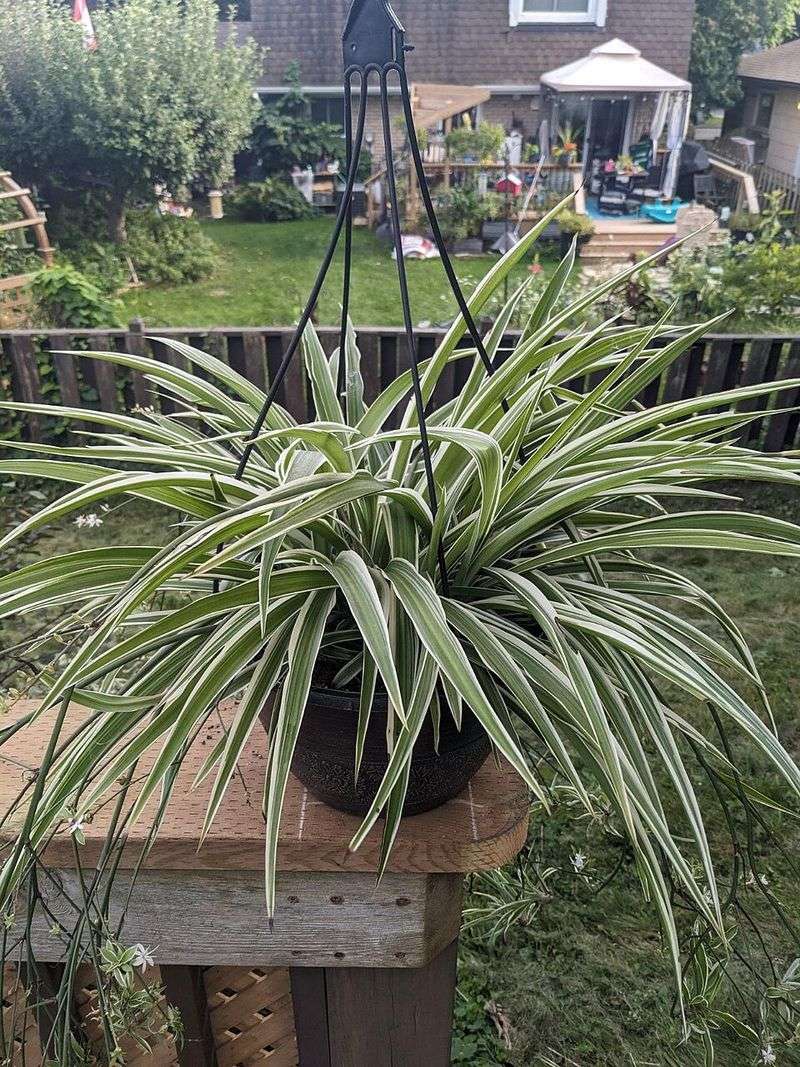
12 Simple Changes That Make Spider Plants Grow Thick And Healthy In California
Follow us on Google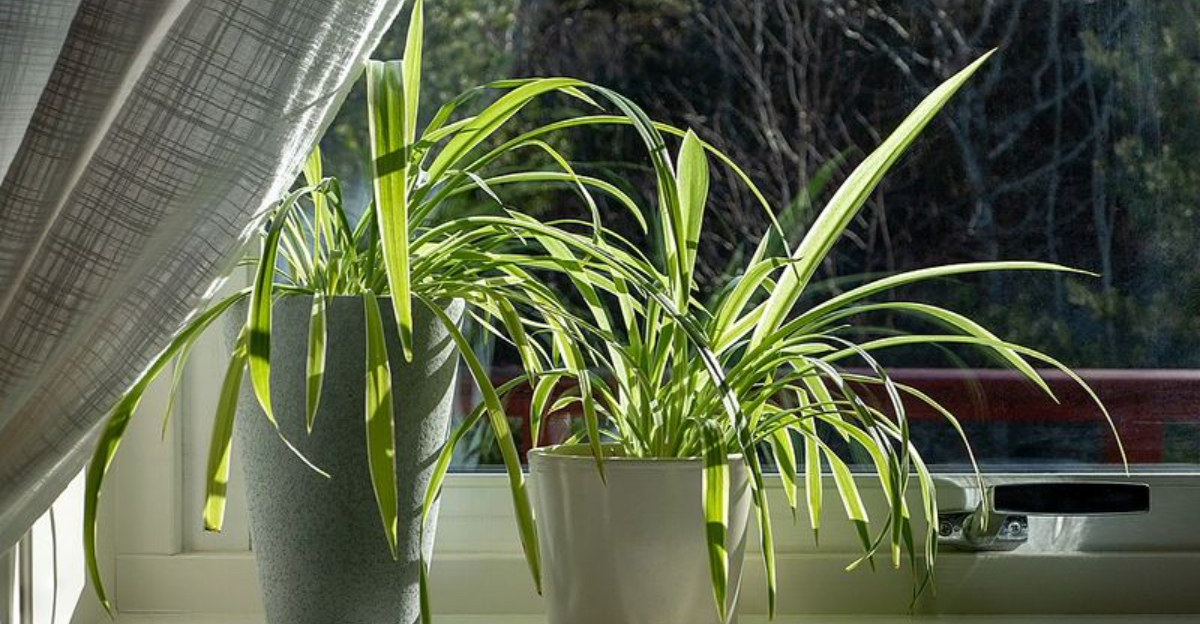
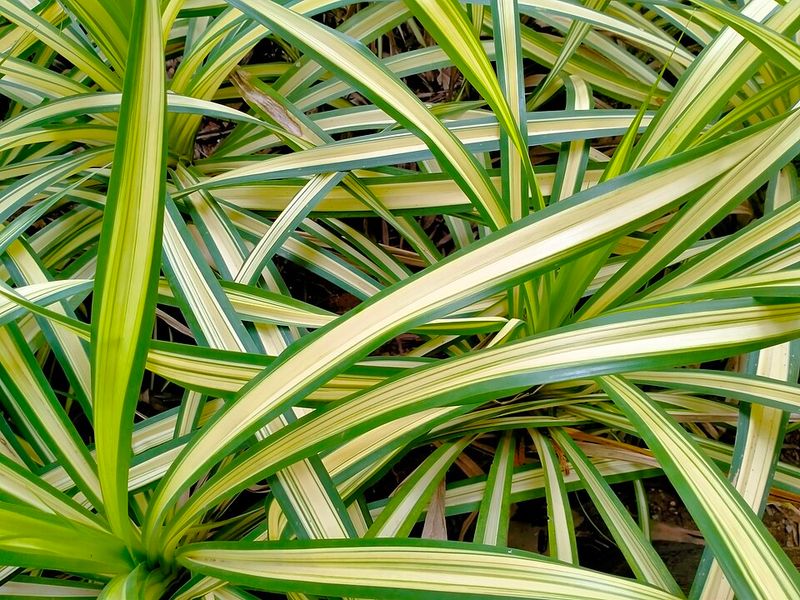
Spider plants usually look easygoing, but California homes can give them a surprisingly mixed set of conditions. Dry indoor air, intense afternoon sun, salty tap water, and fast-draining potting mixes can all leave them thin, pale, and sparse.
The good news is that a few small changes can quickly improve fullness, color, and root health. If you want a plant that throws out plenty of arching leaves and baby spiders, these practical tweaks make a real difference.
Use bright filtered light
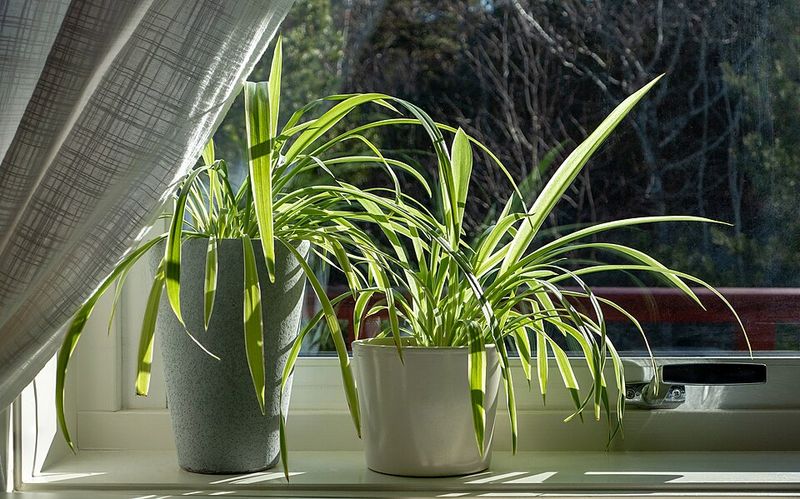
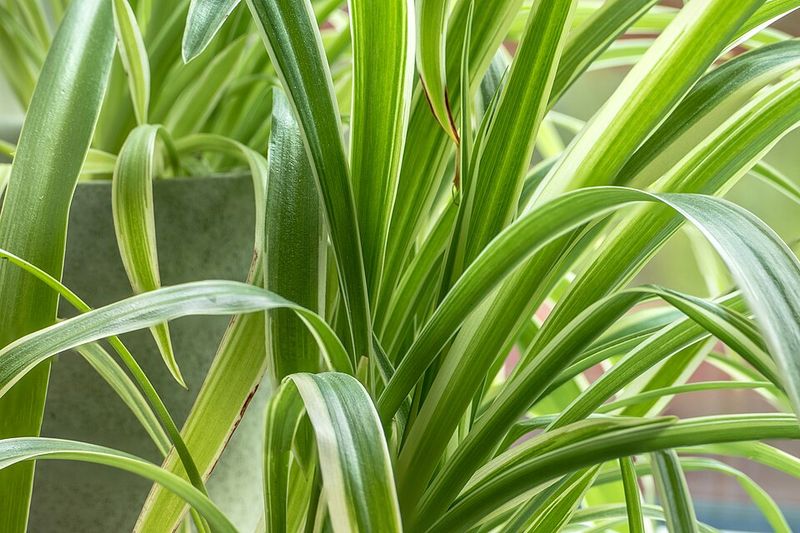
Strong growth starts with getting the light right, and spider plants in California often receive more intensity than they actually enjoy. A spot near an east window or a few feet back from a bright south or west window usually keeps leaves full without bleaching them.
If the stripes look washed out or tips crisp quickly, the plant is probably getting more direct sun than it can comfortably handle.
Inside many California apartments, afternoon light can feel gentle to people but still hit foliage hard, especially through hot glass. Sheer curtains help diffuse that intensity while keeping brightness high enough for steady growth.
In darker rooms, the plant may survive for months, yet produce longer, thinner leaves and fewer offsets because it is stretching toward available light.
Try watching the plant for two weeks instead of changing locations every few days. New leaves should emerge firm, slightly glossy, and wider at the base when light is balanced well.
Once you find that sweet spot, growth becomes more compact, the center fills in faster, and the plant looks thick instead of floppy.
Water when the top inch dries

California weather changes fast, so a rigid watering schedule usually causes more trouble than it solves. Spider plants prefer a steady rhythm where the top inch of soil dries before you water deeply again.
That approach keeps roots active without leaving them soggy, which is especially important in warm inland areas where evaporation can mislead you into overwatering.
Instead of watering every Saturday out of habit, press a finger into the potting mix and feel what is actually happening below the surface. If the top is dry but the lower zone still feels cool and damp, give it another day or two.
When water finally runs through the drainage holes, empty the saucer so roots are never sitting in leftover moisture.
A thirsty spider plant usually looks slightly dull before it fully droops, and the pot feels noticeably lighter in your hand. Overwatered plants often show yellowing leaves, slow growth, and a tired center even though the soil is wet.
Once you start watering by touch rather than by calendar, the plant develops thicker roots, fuller foliage, and far fewer stress signals.
Switch to low mineral water
Brown tips frustrate plenty of spider plant owners, and in many California cities the water itself is a major reason. Tap water can carry fluoride, chlorine, and mineral salts that slowly build up in the soil and irritate sensitive leaf tissue.
If your plant otherwise looks healthy but the ends keep crisping, changing the water source is often the easiest fix.
Filtered water, distilled water, or collected rainwater usually gives the cleanest results, especially for long-term indoor care. You do not need to become overly precious about it, but using low mineral water most of the time can noticeably reduce tip burn.
In coastal areas with hard water, this single adjustment can make new growth emerge cleaner and brighter within a month or two.
Flushing the pot every few weeks also helps wash out leftovers that ordinary watering leaves behind. Run water through the container for a minute, then let it drain thoroughly so salts move out instead of concentrating around the roots.
Paired with better watering habits, cleaner water supports greener leaves, stronger roots, and the thick, fresh look most people want from spider plants.
Choose a fast-draining potting mix
Dense, peat-heavy soil can hold too much moisture around spider plant roots, especially in cooler coastal homes where pots dry slowly. A looser mix keeps air moving underground, which helps roots stay active and reduces the chance of rot.
Good drainage matters just as much as watering frequency when your goal is thicker, healthier top growth.
A reliable blend usually includes regular potting soil plus extra perlite, pumice, or fine orchid bark. That combination holds enough moisture for steady hydration while still allowing excess water to escape quickly after a thorough soak.
If the mix feels muddy, compacts into a heavy mass, or stays wet for many days, it is probably slowing growth more than you realize.
Repotting into a better medium can perk up a tired plant faster than fertilizer alone. Once roots get oxygen again, new leaves often emerge wider, cleaner, and more numerous from the center.
Think of the potting mix as the plant’s daily environment rather than just filler in the container, because when that environment drains well, spider plants respond with stronger roots and denser foliage.
Keep the pot slightly snug
It is tempting to move a spider plant into a large pot and assume extra space will produce extra growth. In reality, too much unused soil often stays wet longer than the roots can handle, which slows the plant and increases stress.
A slightly snug container usually supports better balance between moisture, aeration, and root activity.
These plants like having room to spread, but they also perform well when the root ball fits the pot with only a little extra space around it. If you jump several sizes up, the soil may remain damp for too long after every watering, especially during cooler months near the coast.
That can lead to limp growth, yellow leaves, and a plant that looks stalled instead of full.
When roots are circling tightly or pushing above the soil, move up just one pot size and refresh the mix at the same time. This gives the plant enough room to continue growing without drowning it in excess moisture.
You will usually see better leaf production, stronger offsets, and a tidier shape when the pot feels proportional rather than oversized.
Raise humidity around dry indoor air
Many parts of California have dry air for long stretches, and indoor heating or air conditioning can make that dryness even harsher on spider plants. While they tolerate average household conditions, they often look fuller and develop fewer crispy tips when humidity rises a bit.
You do not need a tropical greenhouse, just a small improvement that keeps leaf edges from drying out so fast.
Grouping plants together naturally creates a slightly more humid microclimate around the foliage. A pebble tray with water below the pot can help a little, and a small humidifier nearby is even more effective during very dry weeks.
Keep airflow present, though, because stale humid air is not the goal and can encourage problems on crowded shelves.
Bathrooms with strong natural light or kitchens with bright indirect light sometimes suit spider plants surprisingly well because the air is less desert-like. If your plant produces healthy centers but always finishes with brown ends, dry air may be a hidden part of the issue.
Raising humidity modestly supports softer leaf tissue, cleaner striping, and a denser overall appearance without requiring constant fuss.
Feed lightly during active growth
Spider plants are not heavy feeders, but they do appreciate a gentle nutrient boost when they are actively producing leaves and offsets. In California, that growing window often stretches from spring into early fall, especially in bright indoor spaces.
A light hand works better than frequent strong doses, because too much fertilizer can burn roots and worsen brown tips.
Use a balanced liquid houseplant fertilizer diluted to half strength about once a month during active growth. If your plant sits in lower light, grows slowly, or was recently repotted into fresh mix, feed even less often.
The goal is to support steady development, not force a dramatic burst that creates weak, floppy leaves.
Watch how the plant responds instead of blindly following the bottle. Healthy new growth should come in with richer color, good width, and stronger posture, while the soil should never develop a crusty white buildup from excess salts.
During winter or any slow period, pause feeding almost entirely so the plant can rest. This restrained approach keeps the roots comfortable and helps the foliage stay thick, balanced, and genuinely healthy rather than overpushed.
Flush out fertilizer salts regularly
Even careful plant owners can end up with salt buildup in the potting mix, especially when fertilizer and mineral-rich water combine over time. Spider plants react to that accumulation with brown tips, dull growth, and roots that struggle to absorb moisture evenly.
A simple flush every few weeks can reset the soil before those issues become obvious.
Take the pot to a sink, tub, or outdoor spot and run room-temperature water through the mix for a minute or two. The goal is to push dissolved salts out through the drainage holes, not just wet the top layer again.
Let the container drain thoroughly afterward so the root zone does not stay waterlogged once the cleanup is done.
This habit matters even more in warm inland California areas where evaporation is high and residues concentrate quickly between waterings. If you fertilize monthly, flushing on the alternate schedule often keeps the root environment much more stable.
Think of it like rinsing soap from fabric rather than adding another product to mask a problem. Cleaner soil supports more efficient water uptake, fewer crispy edges, and stronger leaf production from the center of the plant.
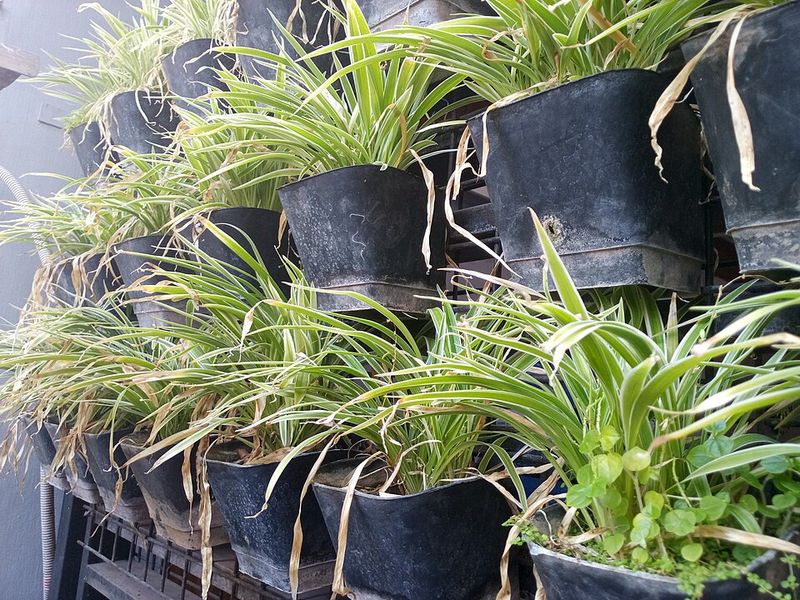
Trim damaged tips and spent leaves
Once a spider plant has brown tips, those damaged ends will not turn green again, no matter how perfect the care becomes afterward. Trimming them back with clean scissors improves appearance immediately and helps you notice whether your recent care changes are actually working.
It is a cosmetic step, but it also keeps the plant looking tidy enough that you are more likely to stay consistent.
Cut just beyond the damaged tissue and mimic the natural point of the leaf instead of making a blunt straight line. Remove any fully yellow, mushy, or collapsed leaves down at the base so the crown stays open and clean.
This reduces clutter, improves airflow around the center, and makes it easier to spot new growth as it appears.
A neater plant often seems healthier because your eyes are not distracted by old stress marks. More importantly, regular grooming prevents spent foliage from shading fresh leaves and creating a crowded interior.
After a trim, place the plant back in bright filtered light and continue with better watering and cleaner water. The combination often gives the plant a renewed, fuller look within a few weeks.
Rotate the pot every week

Plants near windows naturally lean toward the brightest direction, and spider plants are no exception. In many California homes, light comes strongly from one side, which can leave the plant uneven, stretched, and bare on the shaded half.
Rotating the pot a quarter turn every week or so encourages more symmetrical growth and a fuller shape.
This small habit matters more than people expect because leaf placement affects the entire look of the plant. When the same side always faces the sun, leaves there become denser while the opposite side may thin out and lag behind.
Over time, the crown can even shift off center, making the container look lopsided on a shelf or stand.
By turning the plant regularly, you help every section receive a fair share of useful light without changing its overall location. It is especially helpful in apartments with one bright window and limited placement options.
Pair rotation with occasional pruning of old leaves, and the plant usually fills in more evenly from all angles. If you want that classic rounded spider plant silhouette, this is one of the easiest changes to keep on repeat.
Protect it from cold drafts and heat blasts
Spider plants handle normal household temperatures well, but sudden blasts of cold or heat can quietly undo good care. California homes often have strong air conditioning, space heaters, or drafty windows that create sharp swings around the foliage.
Those stress points can cause curled leaves, dry tips, and slower growth even when watering and light seem correct.
Keep the plant away from heating vents, direct air conditioner flow, and exterior doors that open repeatedly during chilly evenings. A comfortable range with gentle airflow is far better than a spot that alternates between warm sun and artificial gusts.
If the leaves quiver whenever the system kicks on, the placement probably needs adjusting.
Temperature stress tends to show up gradually, so it is easy to miss at first. You may notice thinner new leaves, a duller overall color, or a plant that stops producing offsets despite otherwise decent care.
Moving it just a few feet can create a much calmer environment for steady growth. Stable conditions help the roots stay functional and the foliage remain firm, which is exactly what you want when building a thick, healthy spider plant indoors.
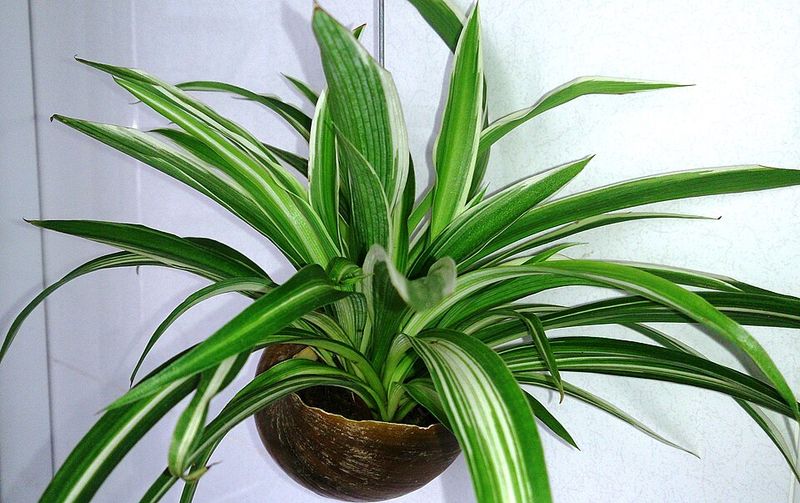
Root and replant healthy babies
When a mature spider plant starts producing babies, you can use that energy to create a fuller display instead of leaving every offset hanging. Rooting a few healthy plantlets and tucking them back into the same pot makes the container look denser much faster.
It is one of the easiest ways to create that abundant, layered look people admire in older plants.
Choose babies with small root nubs or a few starter roots already visible, then place them on moist potting mix around the mother plant. Keep the soil lightly damp, not soaked, while they establish.
In bright filtered light, many plantlets settle in quickly and begin acting like part of the main planting within a few weeks.
This trick works especially well if your original plant has a strong root system but a sparse top. Instead of waiting months for one crown to bulk up, you create fullness by combining several young starts in one balanced container.
Make sure the pot is not overcrowded and the mix still drains well. With regular rotation, light feeding, and steady moisture, the grouped plant develops a thick, graceful shape that looks mature sooner.